|
Chicken Tractor Plans
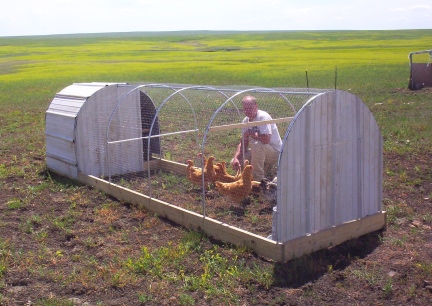
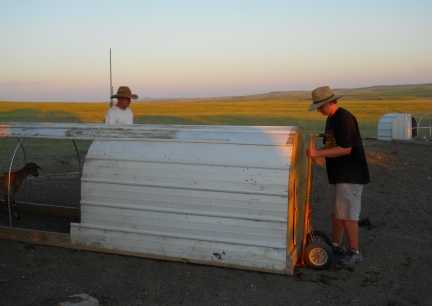
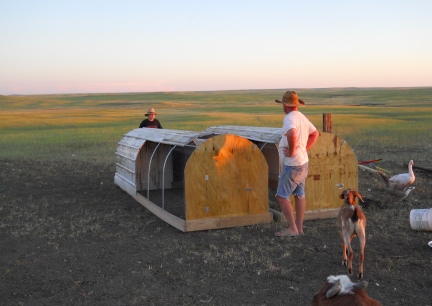
Deron designed and built this Chicken Tractor, with the approval of our Committee, three Embden Geese, that act as if they own and run this place and tell us all the time what we are doing right and wrong...and yes, you can tell the difference by the tone and volume the geese use. They watched Deron's every move as he built this Chicken Tractor.
Deron and I live on a (tight) budget and used items that almost anyone could buy and or even find for free. We were blessed to have been given the old style, heavy weight white steel. The perches were poles we "recycled" from someone else's trash. One perch is a 1/2" x 1" board, bought new, to give the chickens different sized perches, so important to their feet health. Deron made jig the for the arches and used 10' metal conduit poles. His jig works by placing screws into a discarded pallet we got, again someone else's trash, from a Farm Store. He has the screws placed in the pallet so that he can bend the conduit around the jig or pattern that he made. He used six 1/2" x 10' metal conduit pipes in his design for the chicken tractor he built.
The frame is 4' x 16' and made with two 16' 2 x 6 pressure treated - out door grade lumber, and one 8' 2 x 6 pressure treated lumber cut in half. The frame is screwed together with 3 1/2" exterior screws.
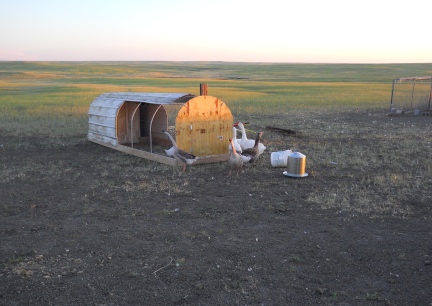
Our Chicken Tractor does not have a bottom on it. Since we will be moving our Chicken Tractor, not only around the property, but also over Deron's Garden Raised Beds...made, of course, to the same size, or why our Chicken Tractors are designed to the size they are.
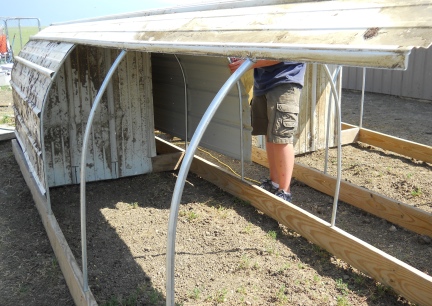
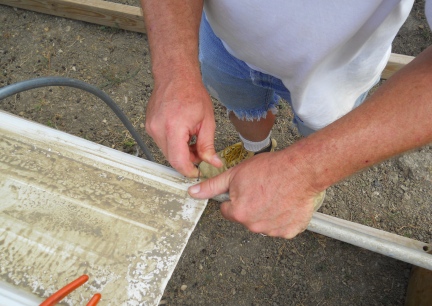
Deron drilled 1/2" holes, for the arched poles, into the frame, put the conduit ends into the holes then added two screws (per side) at a 45 degree angle to hold the arches tighter giving the Chicken Tractor overall, more stability.
The wire is poultry wire and you will need about 50' roll. Deron cut the wire into sections going over the arches, not the length, but the width, of the Chicken Tractor. The poultry wire is both nailed into the wooden frame and attached to the arches.

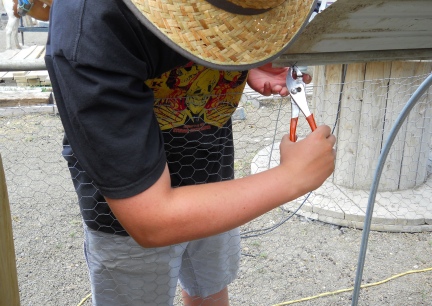
Deron drilled very small holes in the metal arched poles so that we could wire down the cage wire to the poles without it slipping. He used 1/16" holes, but this could vary depending on the size of the wire you choose to use. This took the most time, the wiring the poultry wire to the poles as well as to the steel in the front and back of the Chicken Tractor. Deron cut the poultry wire several inches longer to fit the frame and nailed the wire down with chicken wire fence staples. (Now I thought that staples were staples used for a staple gun. These are U shaped nails that hammer with both sides). Deron ran a running type sewing stitch into and between the pieces of poultry wire with thin wire so that when the snow falls and or a cat or goat pushes into the wire, it holds together as one piece.
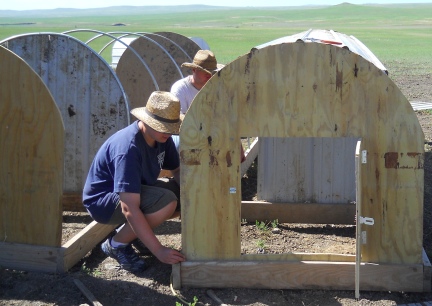
Deron remeasured for the arches when he cut the steel for the Chicken Tractor ends. You will need three pieces of metal (or plywood) approx. 4' x 4' to make each end metal and have the little closed "house" in the back. Each end has a door for caring for the birds. The house in the rear is set from the back arch and the next in line set at just under 4'. The other arches are set at 3' apart so that the poultry wire meets right at the arch for wiring.
Deron added four perches to the Chicken Tractor. There are two on the outside om the cage and two on the inside of the house at the back. They are set up a different heights and the perches have different diameter. Chickens, as well as all other birds, need different types and widths on perches to work the muscles in their feet. It will keep their feet healthy with good circulation and muscle work. The perches each have a small hole drilled in to the ends and are wired to the cage at the arch poles, also drilled for stability of perches. If you would just stick your poles through the wire, it would bend your wire, turn under the birds feet and stretch your fencing.
We have nest boxes in the house for the hens to lay eggs in. They are wooden boxes and lined with hay. The boxes need to be laid out one direction and the perches the other or you will have chicken mess in your boxes and or on your fresh eggs.
MORE ON THE TYPE OF CHICKEN TRACTORS WE BUILD AND USE FOR OUR BIRDS
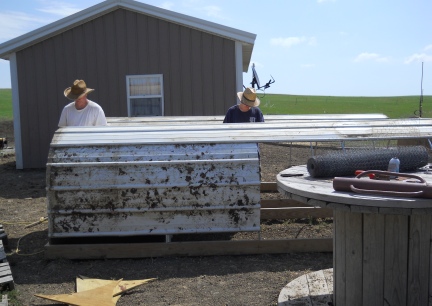
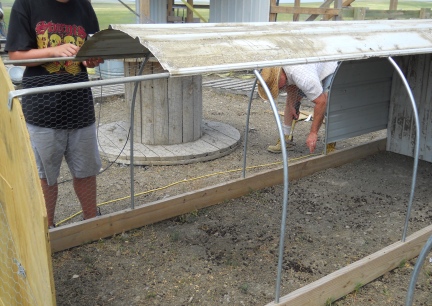
Now that we have used our Chicken Tractor Design for well over a year, in all sorts of NW SD weather, we made some changes to the next two we build/built. Notice that we are using Pressure Treated Plywood on each end of the Chicken Tractor. In the kind of wind we have here, 55 MPH normal in the winter, the metal can be a bit, well, dangerous. We also made the doors a bit larger. As in the first one we built, we do have doors at each end. We also added a strip of Siding Metal down the middle of the top of the tractor. This will add shade for the birds as well as keep at least some of the rain and or snow out of the inside of the caged area.
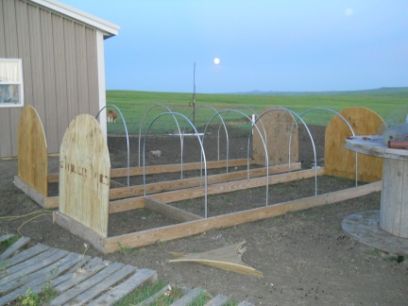
You can see in this photo that Deron used 1/2 sheet of Pressure Treated Plywood for each end. He rounded them out to match the shape of the Chicken Tractor.

For the most part the Chicken Tractor is the same design. I love that there is no bottom, and that it can be moved about for fresh grass and easy cleaning. The wood base is of course Pressure Treated and heavy. You do not want to save your money there, because in a short time, it will cost you more.
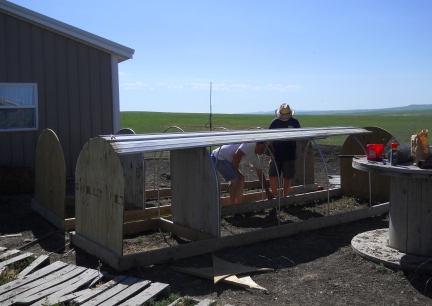
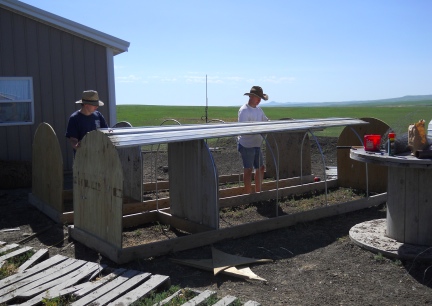
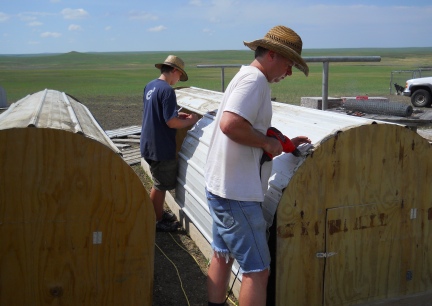
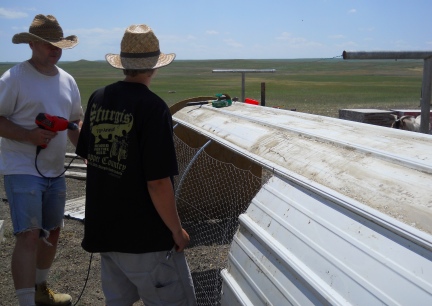
The photo is of Deron and his son Blake (almost 16 y/o) building two Chicken Tractors at the same time. Lord knows I could use about 10 Chicken Tractors. I just picked up some Fantail Pigeons and I see no reason that pigeons could not live a very happy life in these Tractors also. For right now, I have pigeon cages.....but you know I am going to want to own Homing Pigeons again, as I have in the past.
WE WILL BE ADDING MORE DETAILS AS WELL AS PHOTOS AS WE CONTINUE WORKING ON AND WHEN WE FINISH THE TWO CHICKEN TRACTORS WE ARE BUILDING TO MATCH THE FIRST ONE.
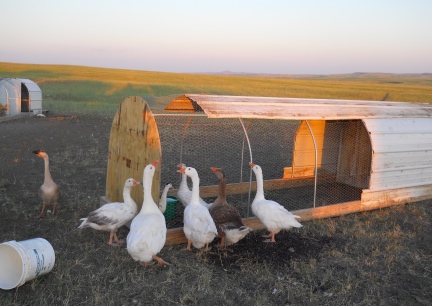
You can tell the metal we are using is recycled by the dirt on the sides. The dirt will wash right off in the first good rain. Your animals will not care if the materials have been recycled/repurposed, just make sure that there are no holes in the metal (or recycled wood) to allow rain to leak in on the animals as they stand/sleep in the sheltered area for protection.
THE FIRST CHICKEN TRACTOR OR LAST YEARS MODEL 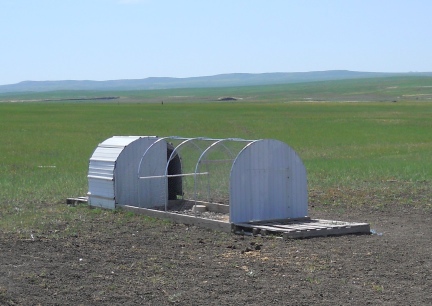
FINISHING UP THE 2011 CHICKEN TRACTORS AND GETTING THEM SET UP
Deron's son Blake came to stay with us approx 4 weeks during the summer of 2011. During that time he learned a lot about building. Between finishing the Chicken Tractors that Deron had started and adding flooring to the barn Blake got to do a lot with tools.
| 


 In the high plains of South Dakota, USA